Crafting is an incredibly rewarding hobby that allows you to express creativity, relieve stress, and even create beautiful and useful items for yourself or as gifts. If you’re new to the world of crafts, it can feel a bit intimidating to know where to start. The good news is that there are plenty of simple, fun, and easy craft projects that anyone can try, regardless of experience. These beginner-friendly crafts require minimal supplies and are the perfect way to dive into the craft world without feeling overwhelmed.
In this article, we’ll explore 10 fun and easy crafts for beginners, each designed to spark your creativity and give you a sense of accomplishment. Whether you’re looking to decorate your home, create personalized gifts, or simply have fun, there’s something here for everyone to try today!

1. Painted Rocks
Why It’s Fun:
Painting rocks is a creative and relaxing craft that can be done with minimal supplies. It’s a great way to create personalized art pieces for your home or even leave them in your community as part of a rock-painting movement.
What You’ll Need:
- Smooth, clean rocks
- Acrylic paint (variety of colors)
- Paintbrushes
- Sealant (optional)
How to Make It:
- Find some smooth, flat rocks that you can paint on.
- Clean them thoroughly to remove dirt and debris.
- Start painting with acrylic paints. You can create abstract designs, animals, flowers, or even motivational quotes.
- Once dry, apply a sealant to protect your artwork if you plan on keeping the rocks outdoors.
Why You’ll Love It:
This craft is easy, portable, and versatile. Plus, it’s a great activity for kids and adults alike. You can even get creative with your designs and make decorative pieces for your garden or home!
2. Friendship Bracelets
Why It’s Fun:
Making friendship bracelets is a classic beginner craft that’s both simple and meaningful. You can create personalized, colorful accessories for yourself, your friends, or your family.
What You’ll Need:
- Embroidery floss or thread (variety of colors)
- Scissors
- Tape or a clipboard (optional, for holding threads)
How to Make It:
- Cut several strands of embroidery floss to your desired length (typically 18-24 inches).
- Tie the strands together at one end and secure it with tape or in a clipboard.
- Use various knotting techniques (such as the basic knot, chevron, or fishtail pattern) to create your bracelet.
- Once you’ve reached the desired length, tie a knot at the end to secure it, and trim any excess.
Why You’ll Love It:
Friendship bracelets are a fun and nostalgic way to showcase your creativity. You can customize them with your favorite colors and even create matching bracelets for a friend or loved one!
3. Paper Flowers
Why It’s Fun:
Paper flowers are a beautiful and inexpensive way to create lasting blooms for any occasion. Whether you’re decorating your home or making gifts, these flowers add a touch of whimsy and charm.
What You’ll Need:
- Colored paper (tissue paper, cardstock, or patterned paper)
- Scissors
- Glue stick or hot glue gun
- Green paper (for leaves, optional)
How to Make It:
- Cut your paper into flower petal shapes (simple oval or rounded petal shapes work well).
- Layer several petals on top of one another, gluing them in place as you go.
- Shape the petals by gently curling them or folding the edges to create dimension.
- If desired, add green paper for leaves and attach them to the base of the flowers.
- Arrange your flowers into a bouquet or add them to greeting cards, home décor, or gift wrapping.
Why You’ll Love It:
Paper flowers are easy to make, and you can customize them in any color or style. They’re a great way to brighten up your home or create unique gift toppers without spending a fortune.
4. DIY Candles
Why It’s Fun:
Making your own candles can be a delightful experience, and the finished product makes for a wonderful gift or décor item. You can experiment with different scents, colors, and containers to personalize your candles.
What You’ll Need:
- Wax (soy wax or beeswax)
- Wick
- Essential oils (for scent)
- Containers or molds (e.g., jars, teacups, molds)
- Double boiler or microwave-safe container
How to Make It:
- Melt the wax using a double boiler or in the microwave.
- While the wax is melting, secure the wick to the bottom of your container using glue or a wick sticker.
- Once the wax is melted, add a few drops of your favorite essential oils for scent.
- Pour the melted wax into the container, leaving space at the top, and let it cool and harden.
- Trim the wick to about half an inch above the surface of the candle.
Why You’ll Love It:
DIY candles are incredibly customizable in terms of scent, color, and design. Plus, they create a cozy atmosphere in your home and can be a lovely, personal gift.
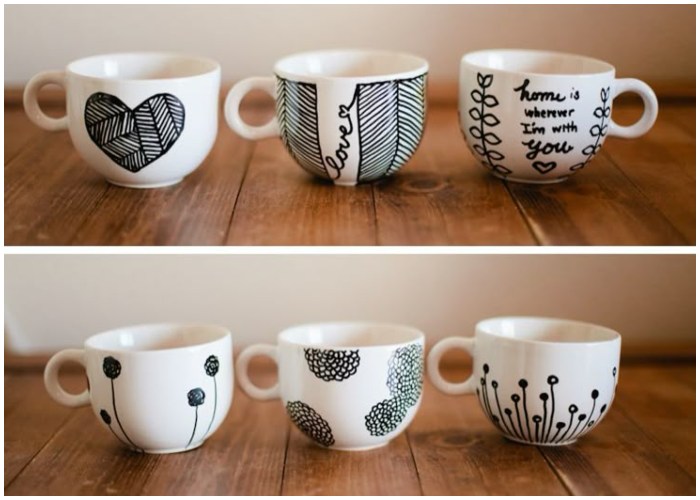
5. Customized Mugs
Why It’s Fun:
Personalized mugs make great gifts and are an excellent way to add a personal touch to your kitchen. You can use simple supplies to create custom designs, quotes, or images on ceramic mugs.
What You’ll Need:
- Plain ceramic mugs
- Oil-based Sharpie markers or ceramic paint pens
- Oven (for setting the design)
How to Make It:
- Use the markers to draw your design on the mug. You can add quotes, patterns, doodles, or anything you like.
- Once the design is complete, let the mug dry for a few hours.
- Set the design by baking the mug in the oven (typically at 350°F for 30 minutes) to ensure the design stays intact.
Why You’ll Love It:
Custom mugs are simple to create and add a personal touch to everyday items. Whether you’re making them for yourself or gifting them to others, these mugs are always a hit.
6. Simple Crochet Projects
Why It’s Fun:
Crochet is a relaxing and rewarding craft that you can easily learn, even if you’ve never picked up a crochet hook before. From blankets to scarves, the possibilities are endless.
What You’ll Need:
- Crochet hook (size appropriate for your yarn)
- Yarn (choose a soft, medium-weight yarn for beginners)
- Scissors
- Pattern (many simple patterns are available for beginners)
How to Make It:
- Start by learning basic crochet stitches like chain stitch (ch), single crochet (sc), and double crochet (dc).
- Follow a simple pattern, like a basic scarf or dishcloth, to practice your skills.
- As you gain confidence, you can try making other items like hats, blankets, or even amigurumi (crocheted stuffed animals).
Why You’ll Love It:
Crochet is an affordable and versatile craft. It’s portable, easy to learn, and allows you to create handmade gifts and cozy accessories for yourself and others.
7. Macramé Wall Hangings
Why It’s Fun:
Macramé is a fantastic way to add texture and style to your walls. This craft involves knotting strings or cords into intricate patterns to create beautiful decorative items.
What You’ll Need:
- Macramé cord or cotton rope
- A wooden dowel or branch (for hanging)
- Scissors
How to Make It:
- Cut your macramé cord into several equal lengths, depending on the desired size of your wall hanging.
- Learn basic knots, such as the square knot and lark’s head knot, to create your design.
- Attach the cords to a dowel or branch, and create your chosen pattern.
- Hang the finished product on your wall for a stunning and unique piece of home décor.
Why You’ll Love It:
Macramé adds a boho-chic touch to any space and is a great way to create stylish, handmade wall art. It’s perfect for beginners and doesn’t require many materials to get started.
8. Painted Wooden Signs
Why It’s Fun:
Wooden signs can be personalized with quotes, names, or designs, and they make great home décor pieces. You can hang them in your kitchen, bedroom, or living room to add a rustic charm.
What You’ll Need:
- Wooden boards or plaques
- Paint and brushes
- Stencils (optional)
How to Make It:
- Sand down the wooden board to smooth the surface.
- Use stencils or freehand to paint your design, whether it’s a quote, pattern, or decorative element.
- Seal the sign with a protective coating to keep your design intact.
Why You’ll Love It:
Wooden signs are customizable and easy to make. They can fit any style, from farmhouse to modern, and add a personal touch to any room.
9. Handmade Greeting Cards
Why It’s Fun:
Making your own greeting cards is an excellent way to create personalized messages for birthdays, holidays, or special occasions. Plus, crafting your cards allows you to add a heartfelt touch that store-bought options can’t match.
What You’ll Need:
- Blank cards or cardstock
- Markers, stamps, or paint
- Stickers, ribbons, or embellishments
How to Make It:
- Start with a blank card or folded cardstock.
- Use stamps, hand-lettering, or drawing to create your design.
- Add decorative touches with stickers, glitter, or embellishments to make the card unique.
Why You’ll Love It:
Greeting cards are quick to make and allow you to be as creative as you like. You can use them for any occasion and even make a batch to keep on hand for upcoming events.
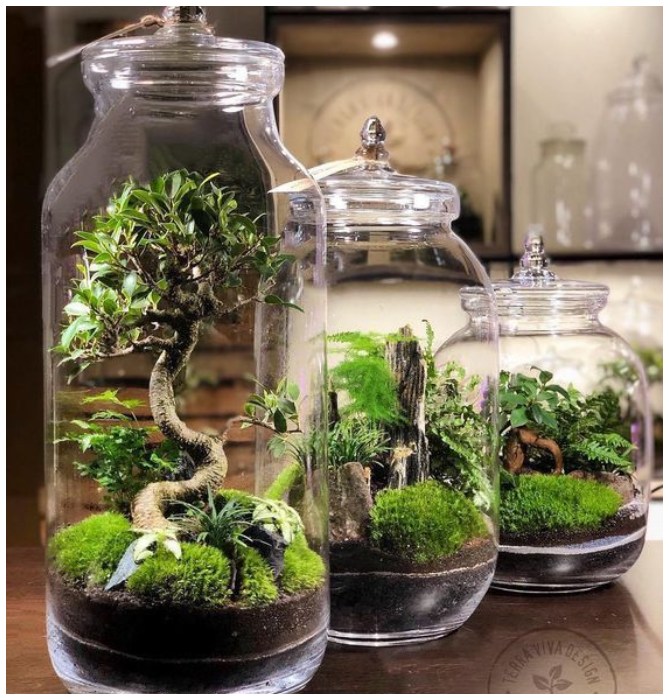
10. Terrariums
Why It’s Fun:
Creating a terrarium is like making your own little indoor garden. It’s a great way to bring nature into your home, and it’s a fun craft that’s easy to maintain.
What You’ll Need:
- Glass container (e.g., jar, vase, or fishbowl)
- Small plants (succulents or air plants work best)
- Decorative stones or gravel
- Potting soil
- Optional: Moss, figurines, or small decorative items
How to Make It:
- Layer the bottom of your glass container with small stones or gravel for drainage.
- Add a layer of potting soil and plant your succulents or air plants.
- Decorate the top with moss, decorative stones, or tiny figurines.
- Place your terrarium in a spot with indirect light and water sparingly.
Why You’ll Love It:
Terrariums are an easy and beautiful way to incorporate plants into your home. They’re low-maintenance and offer a calming, natural element to any space.