Home décor is one of the most exciting ways to express your personal style and create a space that truly feels like your own. While it’s easy to head to a store and pick up pre-made items, making your own personalized home décor allows you to add a unique, meaningful touch to your space that reflects your personality and creativity. Plus, DIY home décor projects are often more budget-friendly and can be customized to fit your exact vision. Whether you’re looking to update a room, create meaningful gifts, or just want to add a personal touch to your living space, this step-by-step guide will walk you through several creative and fun projects you can try. These projects are easy to customize, so feel free to add your own twist to make them truly one-of-a-kind.
1. Personalized Picture Frames
Why It’s Fun:
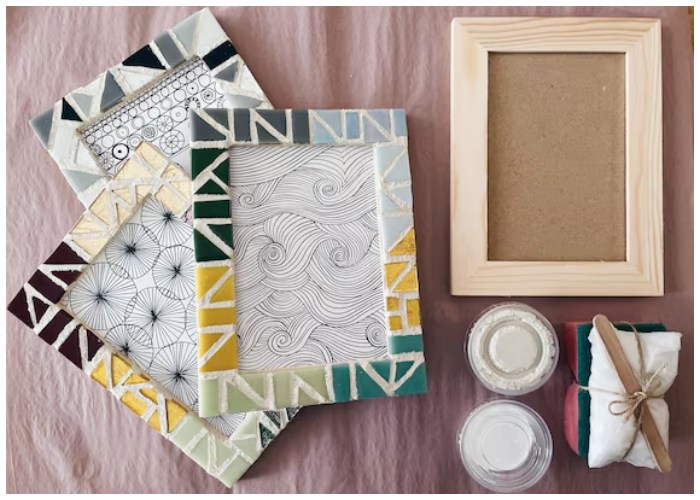
A personalized picture frame is a simple and impactful way to display cherished memories. You can use your creativity to design a frame that complements your home’s color scheme or reflects your personal interests.
What You’ll Need:
- Plain wooden picture frame
- Paint or wood stain
- Decorative elements (e.g., buttons, beads, twine, stickers)
- Hot glue gun or craft glue
- Photos or artwork
How to Make It:
- Prepare the Frame:
Start by sanding down the wooden frame to create a smooth surface. If you’d like a rustic look, you can also leave it raw or lightly distress the edges for added character. - Paint or Stain:
Choose a color that complements your room’s theme. You can paint the entire frame or use a stencil to add patterns. If you prefer a natural look, stain the frame to enhance the wood grain. - Decorate:
Add personal touches by gluing on decorative elements like buttons, beads, or small wooden cutouts. You can also write a favorite quote or the family’s name along the edges. - Insert Your Photo:
Place your favorite photo or artwork into the frame. This adds a personal, nostalgic element to your décor.
Why You’ll Love It:
These custom frames can be used to display family photos, vacation snapshots, or even your kids’ artwork, making them perfect for adding a personal touch to any room.
2. DIY Wooden Sign with a Quote
Why It’s Fun:
A wooden sign with a meaningful quote or phrase is an excellent way to add warmth and personality to your home. You can make a sign for your kitchen, living room, or entryway with a quote that inspires you or reflects your style.
What You’ll Need:
- Wooden board (cut to your desired size)
- Stencils or vinyl lettering (for easy lettering application)
- Paint (acrylic or chalk paint)
- Paintbrush
- Sandpaper (optional, for a distressed look)
How to Make It:
- Prep the Wood:
Sand the wooden board to remove any rough edges or imperfections. If you want a rustic look, you can distress the edges by lightly sanding them for a worn-in, vintage appearance. - Add Your Design:
If you’re using stencils or vinyl letters, place them on the board and paint over them. If you prefer a freehand look, use a pencil to sketch out the quote and then paint it in. Popular options include family sayings, motivational quotes, or home-related phrases like “Home Sweet Home.” - Customize:
After the paint dries, you can add decorative touches like small wooden accents, twine, or floral elements to match your home’s theme. - Seal the Design:
Apply a clear coat of protective sealant to ensure the paint lasts and doesn’t get scratched over time.
Why You’ll Love It:
A personalized quote sign not only adds character to your walls but also provides an emotional connection with your space. You can easily change the quote to reflect different seasons, holidays, or personal milestones.
3. Personalized Throw Pillows
Why It’s Fun:
Throw pillows are an easy and inexpensive way to update your home’s décor. With a little sewing or fabric glue, you can create custom pillows that complement your living room, bedroom, or even your kids’ playroom.
What You’ll Need:
- Plain pillow covers or fabric (for DIY covers)
- Fabric paint, markers, or iron-on designs
- Sewing machine or fabric glue (if making your own pillow covers)
- Stuffing (if making your own pillows)
How to Make It:
- Choose Your Fabric:
Select fabric in the colors and patterns that suit your home. You can use cotton, linen, or any fabric that feels soft and durable. - Create the Pillow Cover:
If you’re making your own pillow cover, cut two squares or rectangles of fabric to the size of your pillow. Sew or glue the edges together, leaving one side open to insert the pillow stuffing. - Personalize the Design:
Use fabric paint or markers to create your design on the pillow cover. You can paint a monogram, a favorite quote, or geometric patterns. If you prefer something more intricate, iron-on designs or stencils can help you achieve a professional look. - Assemble the Pillow:
Insert the pillow stuffing into your new cover, then sew or glue the opening shut.
Why You’ll Love It:
Personalized throw pillows allow you to create cozy, custom accents for your home. You can easily swap them out to refresh your space or to align with changing seasons or holidays.
4. Hand-Painted Flower Pots
Why It’s Fun:
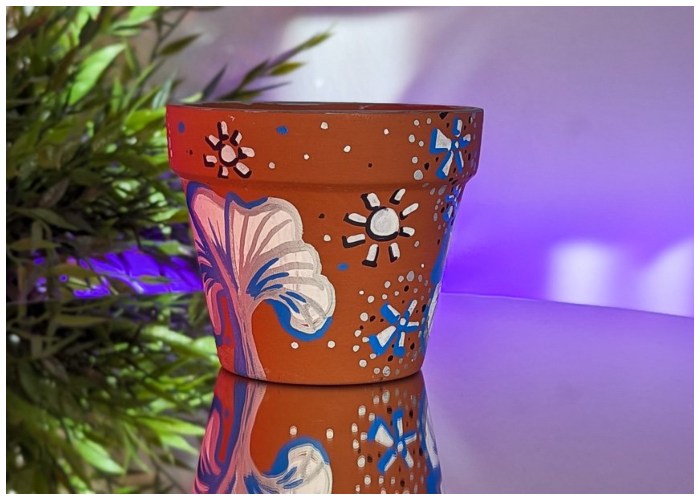
Adding a personal touch to your plants is a fantastic way to bring life and color to any room. By painting flower pots, you can customize them to suit your home’s aesthetic and make your plants feel like a part of your décor.
What You’ll Need:
- Plain terracotta or ceramic flower pots
- Acrylic paint
- Paintbrushes
- Stencils or tape (optional for patterns)
- Clear sealant (optional)
How to Make It:
- Prep the Pots:
Clean the pots thoroughly to remove any dust or dirt. If you’re using terracotta pots, you may want to seal them with a primer to prevent the paint from soaking into the material. - Paint the Pots:
Use acrylic paint to create your design. You can paint solid colors, add stripes, or even create patterns using stencils or painter’s tape. - Add a Personal Touch:
Customize the pots with your family’s initials, your favorite quotes, or whimsical designs like hearts or flowers. - Seal the Paint:
Once your design is dry, seal the paint with a clear coat to protect it from moisture and wear.
Why You’ll Love It:
Hand-painted flower pots are an easy and affordable way to add personality to your plants, making them a beautiful addition to your windowsills, shelves, or garden.
5. Customized Wall Shelves
Why It’s Fun:
Wall shelves not only provide practical storage solutions but can also act as statement pieces in your home. By creating your own shelves, you can personalize the design to fit your space perfectly.
What You’ll Need:
- Wooden planks or boards
- Brackets or shelf supports
- Screws and a drill
- Sandpaper and paint (optional)
How to Make It:
- Choose Your Materials:
Select wooden planks that fit the dimensions of the wall space where you want to place the shelf. - Prepare the Wood:
Sand the edges of the planks to smooth out any rough spots. If you want a more polished look, paint or stain the wood. - Attach the Brackets:
Attach the shelf brackets to the wall using screws and a drill, making sure they’re level. Then, place the wooden planks on the brackets and secure them with screws. - Style Your Shelf:
Add your favorite books, plants, photos, or decorative objects to personalize your new shelf.
Why You’ll Love It:
Customized wall shelves allow you to showcase your personality and style while also providing functional storage. Whether it’s for the living room, kitchen, or bathroom, these shelves make a practical and stylish addition to any space.
6. DIY Coasters
Why It’s Fun:
Coasters are small but impactful accessories that can add personality to your coffee table or dining room. Creating personalized coasters is a fun and easy way to make your home feel more unique.
What You’ll Need:
- Cork, wood, or ceramic coaster blanks
- Paint, markers, or fabric
- Mod Podge or sealant
- Decorative elements (e.g., washi tape, stickers)
How to Make It:
- Choose Your Material:
Select the material for your coasters—cork, wood, or ceramic are all great options. - Decorate the Coasters:
Use paint, markers, or fabric to create designs on the coasters. You can add initials, geometric patterns, or even images of your favorite places or objects. - Seal and Protect:
Once your design is dry, apply Mod Podge or a sealant to protect the coasters from water and stains.
Why You’ll Love It:
DIY coasters are both functional and stylish. They make great gifts and can be customized to fit any occasion, from casual get-togethers to formal events.